10 Jul 2011
Implementing ZoomBox in Blogger
 Zoombox is an easy to use jquery modul that allows you to display images, html content and multi media content with a "lightbox" that floats over your web page.
Features
>Can display all kind of links : Images, Flash animations, Youtube videos, Dailymotion videos, Iframe, HTML Content
>Everything is customizable, you can create new themes using CSS
>You can group your link and make galleries
Steps to Add it to Blogger:
1.Login to the Blogger account
2. Now Go to Design > Edit HTML.
Change the address of the FLVplayer.swf in the zoombox.js for the correct working of the script
3.Now search for the </head> tag and paste the following code just Above/Before it.
<link href="http://dl.dropbox.com/u/27675057/Zoombox/zoombox.css" media="screen" rel="stylesheet" type="text/css"></link>Add the following JavaScript Snippet after the content a.k.a. the elements using zoombox
<script src="https://ajax.googleapis.com/ajax/libs/jquery/1.5.1/jquery.min.js" type="text/javascript">
</script>
<script src="http://dl.dropbox.com/u/27675057/Zoombox/zoombox.js" type="text/javascript">
</script>
<script type="text/javascript">

//<![CDATA[
    $(function(){
        $('a.zoombox').zoombox();
    });

//]]>
</script>
2.Go to the Post/Page you want to add ZoomBox and then go to Edit HTML tab .
3.Now copy the code from below and paste it there.
<link href="http://dl.dropbox.com/u/27675057/Zoombox/zoombox.css" media="screen" rel="stylesheet" type="text/css"></link>


-------The Content------


<script src="https://ajax.googleapis.com/ajax/libs/jquery/1.5.1/jquery.min.js" type="text/javascript">
</script>
<script src="http://dl.dropbox.com/u/27675057/Zoombox/zoombox.js" type="text/javascript">
</script>

<script type="text/javascript">

//<![CDATA[
    $(function(){
        $('a.zoombox').zoombox();
    });

//]]>
</script>
Change the address of the FLVplayer.swf in the zoombox.js for the correct working of the script
4.Now for adding the images into Zoombox ,Firstly add the image normally using Insert Image Button
Now When you see the code in the edit HTML window it would be something like this
<a href="large3.jpg"><img border="0" height="90" src="/small3.jpg" width="120" /></a> |
Make it like this
| a class="zoombox" href="large3.jpg"><img border="0" height="90" src="/small3.jpg" width="120" /></a> |
As you see we only added class="zoombox"
For Adding gallery just add class="zoombox GalleryName" to all the elements of the Gallery
You can video format like FLV,MP4 and iFrames with just class="zoombox" tag Here is the Example Code:
<a class="zoombox w500 h400" href="http://www.grafikart.fr/img/zoombox/video.flv" title="">FLV</a>

<a class="zoombox w450 h375" href="http://www.grafikart.fr/img/zoombox/video.mp4" title="">MP4/Mov</a>

<a class="zoombox" href="http://grafikart.fr/zoombox">This is my site </a>
It also supports Youtube, Dailymotion, Vimeo ,etc Here is the Example Code:
<a class="zoombox" href="http://www.youtube.com/watch?v=8oejjWGFs6o" title="Hey this is youtube !">Youtube</a>

<a class="zoombox" href="http://www.dailymotion.com/JojoRatonLaveur/video/x1xhl1_jojodemarrages2diabolos_creation" title="Dailymotion now">Dailymotion</a>

<a class="zoombox" href="http://vimeo.com/752979" title="We all like vimeo !">Vimeo</a>
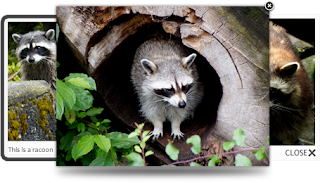
Well the most amazing thing about this Lightbox is its ability to open a itself inside a itself (Something like Inception).Well I tested it and found to my surprise that it really worked beyond my expectations .The image below tells it all.
5.Now save the Post/Page.
Note: Please Host all the files on free hosting service like DropBox or Blogspot itself!
Another Important thing to note is that all the images used in this tutorial like Next button ,Previous button ,etc are all hosted on Google Code service which are the fastest and most reliable servers on the internet with the least downtime.So you can easily implement this with no hassles for Image Hosting.
Til next time,
Prayag Verma
at 18:37


